
Hello lovely reader! Today I am showing you how to achieve mermaid nails in this special Tuesday edition of Step-by-Step Nail Art.

The Base
Start off this look my applying 1 to 2 coats of a pink holographic nail polish. Seal your base with a quick dry top coat and wait for your nail polish to completely dry off before moving on to the next step.
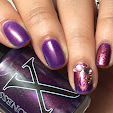
Shown below is Cloud Nine by Color Club.
 |
| The Base: Cloud Nine by Color Club |
The Mermaid Scales
The first step to achieve the mermaid scales is to place mermaid scale nail stencils** over your base coat. The mermaid scale stencils I used are from Vibrant Vinyls. Let me pause to tell you a little bit about these vinyls. They have a small corner flab that allow for an easy and clean peel off. This means that you will not need to spend extra time weaving off the inner scale parts (I have done these before with lesser quality vinyls and it is not fun!). A sheet of 12 mermaid scale stencils retails for $5.99 US and it comes in a variety of colors to choose from. You can use my code LACQUEREX for 10% off your purchase!
 |
| The mermaid scales: nail stencils from Vibrant Vinyls |
The second step to achieve the mermaid scales is to apply a baby blue and mint green gradient. To do so, brush your nail polishes over a latex-free makeup sponge and sponge over nail vinyls. You will need to repeat this step until you achieve your desired opacity.
The polishes I used for my gradients were Doodle Bug (baby blue) and Bunny-Foo-Foo (green mint) by Pretty Serious Cosmetics (reviewed here).
 |
| The mermaid scales: Doodle Bug and Bunny-Foo-Foo by Pretty Serious Cosmetics |
The Final Look
To finish, apply rhinestones on your ring finger nail and use a fast drying top coat to seal your nail art.


I hope these inspire you to take on this popular summer design, and as always, thank you very much for reading!
**These products were purchased using a blogger's discount. All opinions expressed are my own.


It's so pretty! I never think of the proper color combinations for vinyls but this is fantastic!
ReplyDeleteI'm kind of obsessed with these! So stunning!
ReplyDeleteThe addition of the jewels is great. This might be my favorite mermaid mani I've seen to date.
ReplyDeletei really need to get some of these vinyls!!
ReplyDeleteYour nails are so pretty! I am digging all of the mermaid nails I'm seeing this Summer.
ReplyDeleteThis is 100% flawless!!! I need to get some of these stencils asap!
ReplyDeleteI love, LOVE that holo base. And the vinyl and mermaid colours were perfect.
ReplyDeleteWow!!!! This is just stunning!!! I love your choice of colors!
ReplyDeleteThis is absolutely perfect!
ReplyDeleteThis is so pretty! I love it!
ReplyDeleteThese are stunning! I love that the vinyls have that flap at the edge to help with peeling off!
ReplyDeleteLoving this design!! Especially the rhinestones you added to it!
ReplyDelete